Difference between revisions of "Morgaroth"
| Line 16: | Line 16: | ||
== Loot Table == | == Loot Table == | ||
| + | |||
| + | <table class="wikitable sortable"> | ||
| + | <tr> | ||
| + | <td align="left" valign="top"> | ||
| + | <center>'''[[Items|Boss Items]]'''</center> | ||
| + | [[File:Boss Coin2.gif|link=]] [[Boss Coin Shop|boss coin]]<br> | ||
| + | [[File:Relic Chest.gif|link=]] [[Relics#Relic_List|relic chest]] | ||
| + | |||
| + | [[File:Attunement Item 2.gif|alt=]] [[Soul Attunement|soul of summer champion belathriel]] | ||
| + | |||
| + | [[File:Dreamfire Staff.gif|link=]][[Rods|dreamfire staff]] | ||
| + | |||
| + | [[File:Dreamfire Bow.gif|link=]] [[Bows|dreamfire bow]]<br>[[File:Dreamfire Crossbow.gif|link=]][[Crossbows|dreamfire crossbbow]] | ||
| + | |||
| + | [[File:Dreamfire Sword2.gif|link=]][[Swords|dreamfire sword]]<br>[[File:Dreamfire Axe.gif|link=]][[Axes|dreamfire axe]] | ||
| + | |||
| + | [[File:Dreamfire Mace.gif|link=]][[Clubs|dreamfire mace]] | ||
| + | |||
| + | [[File:Dreamfire Sword.gif|link=]][[Daggers|dreamfire dagger]] | ||
| + | |||
| + | [[File:Dreamfire Claw.gif|link=]][[Rings|dreamfire claw]] | ||
| + | </td> | ||
| + | <td align="left" valign="top"> | ||
| + | <center>'''[[Jewelry]]'''</center> | ||
| + | [[File:Crystal Coin.gif|link=]] 3-6x crystal coin | ||
| + | |||
| + | [[File:Giant Amethyst.gif|link=]]giant amethyst<br> | ||
| + | [[File:Giant Ruby.gif|link=]] 1-2x giant ruby | ||
| + | |||
| + | [[File:Giant Emerald.gif|link=]]1-2x giant emerald | ||
| + | |||
| + | [[File:Giant Topaz.gif|link=]]1-2x giant topaz | ||
| + | |||
| + | [[File:Giant Sapphire.gif|link=]]giant sapphire | ||
| + | </td> | ||
| + | <td align="left" valign="top"> | ||
| + | <center>'''[[Liquids]]'''</center> | ||
| + | [[File:Ultimate Mana Potion.gif|link=]] 1-16x ultimate mana potion<br> | ||
| + | [[File:Ultimate Spirit Potion.gif|link=]] 1-16x ultimate spirit potion<br> | ||
| + | [[File:Supreme Health Potion.gif|link=]] 1-16x supreme health potion<br> | ||
| + | [[File:Mastermind Potion.gif|link=]] 1-5x mastermind potion<br> | ||
| + | [[File:Bullseye Potion.gif|link=]] 1-5x bullseye potion<br> | ||
| + | [[File:Berserk Potion.gif|link=]] 2-5x berserk potion | ||
| + | </td> | ||
| + | </tr> | ||
| + | <tr> | ||
| + | <td align="left" valign="top"> | ||
| + | <center>[[Gem Atelier|'''Gems''']] | ||
| + | [[File:Lesser Marksman Gem.gif|link=]][[File:Lesser Mystic Gem.gif|link=]][[File:Lesser Sage Gem.gif|link=]][[File:Lesser Guardian Gem.gif|link=]][[File:Lesser Spiritualist Gem.gif|link=]][[File:Lesser Ninja Gem.gif|link=]] | ||
| + | |||
| + | [[File:Marksman Gem.gif|link=]][[File:Mystic Gem.gif|link=]][[File:Sage Gem.gif|link=]][[File:Guardian Gem.gif|link=]][[File:Spiritualist Gem.gif|alt=]][[File:Ninja Gem.gif|link=]] | ||
| + | |||
| + | [[File:Greater Marksman Gem.gif|link=]][[File:Greater Mystic Gem.gif|link=]][[File:Greater Sage Gem.gif|link=]][[File:Greater Guardian Gem.gif|link=]][[File:Greater Spiritualist Gem.gif|alt=]][[File:Greater Ninja Gem.gif|link=]] | ||
| + | </center> | ||
| + | </td> | ||
| + | <td align="left" valign="top"> | ||
| + | <center>[[Pet Upgrading#Boosts|'''Pet Boost Tokens''']] | ||
| + | [[File:petice.gif|link=]][[File:petdeath.gif|link=]][[File:petholy.gif|link=]][[File:petfire.gif|link=]][[File:petenergy.gif|link=]][[File:petearth.gif|link=]] | ||
| + | |||
| + | [[File:petphysical.gif|link=]][[File:petdistance.gif|link=]][[File:petmagic.gif|link=]][[File:petdmg.gif|link=]][[File:petmelee.gif|link=]]</center> | ||
| + | </td> | ||
| + | <td align="left" valign="top"></td> | ||
| + | </tr> | ||
| + | </table> | ||
| + | |||
<table class="wikitable sortable"> | <table class="wikitable sortable"> | ||
<tr> | <tr> | ||
Revision as of 23:14, 11 August 2026
Boss
To go back to bosses page, click here

Boss Info
 Classification: Archfoe
 Location: Morgaroth Quest
 Health: 5.5kk
 Experience: 15k
Bosstiary Progress
 Prowess: 5 kills
 Expertise: 20 kills
 Mastery: 40 kills
Loot Table
|
|
|
|
|
|
     |


 3-6x crystal coin
 giant amethyst
 1-2x giant ruby
 1-2x giant emerald
 1-2x giant topaz
 giant sapphire
 1-16x ultimate mana potion
 1-16x ultimate spirit potion
 1-16x supreme health potion
 1-5x mastermind potion
 1-5x bullseye potion
 2-5x berserk potion


Location
1. Take the waypoint to Nevada - Morgaroth Quest
2. It will require 11 fire bugs to remove a Burning Wall.
They loot from all monsters around these maps.
You can use !autoloot add, fire bug to make the looting easier.
3. Follow this way to progress through the way and beware of the monsters.
- Since this map is huge, I will leave the markers that you will follow to progress.
- It is kinda linear, so don't worry about the next maps.
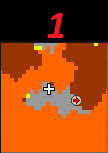
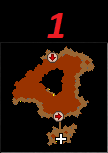
4. When reaching this point, follow this way to progress.
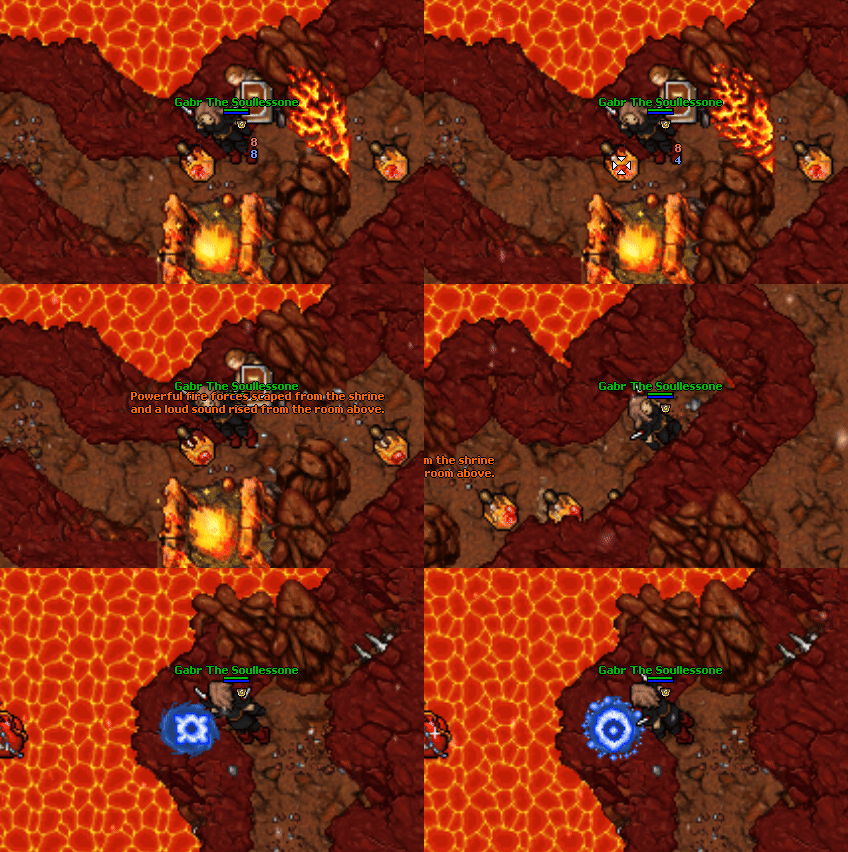
5. When reaching the Burning Wall, use the 11 fire bugs on the Fire Shrine next to it, and step on the teleporter to the next part.
6. Follow this way to find the teleporter to the boss lever room.
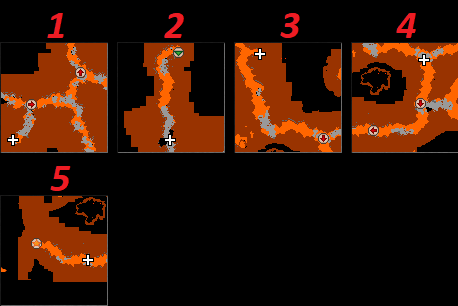
7. Enter on the teleporter to reach the boss lever room.
To face Morgaroth, pull the lever.
You can go either solo or with other 22 players.
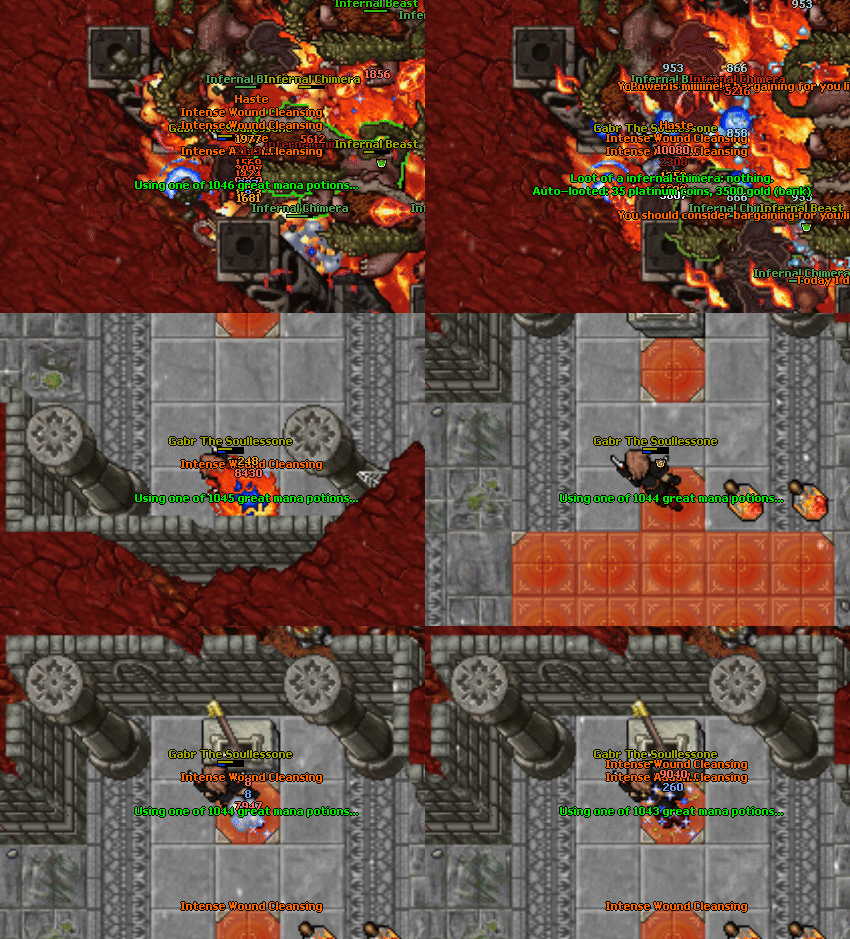
Mechanics
Morgaroth will teleport himself inside the room over time.
You can see the location through a blue arrow effect inside the room.
Shooters should avoid standing closer to it, while dealing with all the regular boss mechanics.
Six Demons will spawn inside the room over time aswell.
Repeat it until the boss is killed.