Difference between revisions of "Summer Champion Belathriel"
| (3 intermediate revisions by the same user not shown) | |||
| Line 1: | Line 1: | ||
| − | == | + | == Boss == |
<i>To go back to bosses page, [[Bosses|click here]]</i> | <i>To go back to bosses page, [[Bosses|click here]]</i> | ||
<hr> | <hr> | ||
| − | [[File:Summer Champion Belathriel.gif]] | + | [[File:Summer Champion Belathriel.gif|link=]] |
<b>Boss Info</b><br> | <b>Boss Info</b><br> | ||
| − | [[file:Bosstiary Archfoe.png]] Classification: Archfoe<br> | + | [[file:Bosstiary Archfoe.png|link=]] Classification: Archfoe<br> |
| − | [[file:Speed Icon.gif]] Location: | + | [[file:Speed Icon.gif|link=]] Location: Summer Court<br> |
| − | [[File:HP Icon.gif]] Health: 5kk<br> | + | [[File:HP Icon.gif|link=]] Health: 5kk<br> |
| − | [[File:XP Icon.gif]] Experience: 15.8kk<br> | + | [[File:XP Icon.gif|link=]] Experience: 15.8kk<br> |
<b>Bosstiary Progress</b><br> | <b>Bosstiary Progress</b><br> | ||
| − | [[file:Prowess Icon.gif]] Prowess: 5 kills<br> | + | [[file:Prowess Icon.gif|link=]] Prowess: 5 kills<br> |
| − | [[file:Expertise Icon.gif]] Expertise: 20 kills<br> | + | [[file:Expertise Icon.gif|link=]] Expertise: 20 kills<br> |
| − | [[file:Mastery Icon.gif]] Mastery: 40 kills<br> | + | [[file:Mastery Icon.gif|link=]] Mastery: 40 kills<br> |
== Loot Table == | == Loot Table == | ||
| + | |||
<table class="wikitable sortable"> | <table class="wikitable sortable"> | ||
| − | |||
| − | |||
| − | |||
| − | |||
| − | |||
| − | |||
<tr> | <tr> | ||
| − | <td align=" | + | <td align="left" valign="top"> |
| − | + | <center>'''[[Items|Boss Items]]'''</center> | |
| − | + | [[File:Boss Coin2.gif|link=]] [[Boss Coin Shop|boss coin]]<br> | |
| − | + | [[File:Relic Chest.gif|link=]] [[Relics#Relic_List|relic chest]] | |
| − | + | [[File:Attunement Item 2.gif|alt=]] [[Soul Attunement|soul of summer champion belathriel]] | |
| − | |||
| − | |||
| − | |||
| − | |||
| − | + | [[File:Dreamfire Staff.gif|link=]][[Rods|dreamfire staff]] | |
| − | |||
| − | |||
| − | |||
| − | |||
| − | + | [[File:Dreamfire Bow.gif|link=]] [[Bows|dreamfire bow]]<br>[[File:Dreamfire Crossbow.gif|link=]][[Crossbows|dreamfire crossbbow]] | |
| − | |||
| − | |||
| − | |||
| − | |||
| − | + | [[File:Dreamfire Sword2.gif|link=]][[Swords|dreamfire sword]]<br>[[File:Dreamfire Axe.gif|link=]][[Axes|dreamfire axe]] | |
| − | |||
| − | |||
| − | |||
| − | |||
| − | + | [[File:Dreamfire Mace.gif|link=]][[Clubs|dreamfire mace]] | |
| − | |||
| − | |||
| − | |||
| − | |||
| − | + | [[File:Dreamfire Sword.gif|link=]][[Daggers|dreamfire dagger]] | |
| − | |||
| − | |||
| − | |||
| − | |||
| − | + | [[File:Dreamfire Claw.gif|link=]][[Rings|dreamfire claw]] | |
| − | + | </td> | |
| − | <td align=" | + | <td align="left" valign="top"> |
| − | < | + | <center>'''[[Jewelry]]'''</center> |
| − | + | [[File:Crystal Coin.gif|link=]] 3-6x crystal coin | |
| − | + | [[File:Giant Amethyst.gif|link=]]giant amethyst<br> | |
| − | + | [[File:Giant Ruby.gif|link=]] 1-2x giant ruby | |
| − | |||
| − | |||
| − | |||
| − | + | [[File:Giant Emerald.gif|link=]]1-2x giant emerald | |
| − | |||
| − | |||
| − | |||
| − | |||
| − | + | [[File:Giant Topaz.gif|link=]]1-2x giant topaz | |
| − | |||
| − | |||
| − | |||
| − | |||
| − | < | + | [[File:Giant Sapphire.gif|link=]]giant sapphire |
| − | <td align="center | + | </td> |
| − | < | + | <td align="left" valign="top"> |
| − | < | + | <center>'''[[Liquids]]'''</center> |
| + | [[File:Ultimate Mana Potion.gif|link=]] 1-16x ultimate mana potion<br> | ||
| + | [[File:Ultimate Spirit Potion.gif|link=]] 1-16x ultimate spirit potion<br> | ||
| + | [[File:Supreme Health Potion.gif|link=]] 1-16x supreme health potion<br> | ||
| + | [[File:Mastermind Potion.gif|link=]] 1-5x mastermind potion<br> | ||
| + | [[File:Bullseye Potion.gif|link=]] 1-5x bullseye potion<br> | ||
| + | [[File:Berserk Potion.gif|link=]] 2-5x berserk potion | ||
| + | </td> | ||
</tr> | </tr> | ||
| − | |||
<tr> | <tr> | ||
| − | <td align=" | + | <td align="left" valign="top"> |
| − | + | <center>[[Gem Atelier|'''Gems''']] | |
| − | + | [[File:Lesser Marksman Gem.gif|link=]][[File:Lesser Mystic Gem.gif|link=]][[File:Lesser Sage Gem.gif|link=]][[File:Lesser Guardian Gem.gif|link=]][[File:Lesser Spiritualist Gem.gif|link=]][[File:Lesser Ninja Gem.gif|link=]] | |
| − | |||
| − | + | [[File:Marksman Gem.gif|link=]][[File:Mystic Gem.gif|link=]][[File:Sage Gem.gif|link=]][[File:Guardian Gem.gif|link=]][[File:Spiritualist Gem.gif|alt=]][[File:Ninja Gem.gif|link=]] | |
| − | |||
| − | |||
| − | |||
| − | |||
| − | + | [[File:Greater Marksman Gem.gif|link=]][[File:Greater Mystic Gem.gif|link=]][[File:Greater Sage Gem.gif|link=]][[File:Greater Guardian Gem.gif|link=]][[File:Greater Spiritualist Gem.gif|alt=]][[File:Greater Ninja Gem.gif|link=]] | |
| − | + | </center> | |
| − | + | </td> | |
| − | + | <td align="left" valign="top"> | |
| − | + | <center>[[Pet Upgrading#Boosts|'''Pet Boost Tokens''']] | |
| − | + | [[File:petice.gif|link=]][[File:petdeath.gif|link=]][[File:petholy.gif|link=]][[File:petfire.gif|link=]][[File:petenergy.gif|link=]][[File:petearth.gif|link=]] | |
| − | |||
| − | |||
| − | |||
| − | |||
| − | |||
| − | |||
| − | |||
| − | |||
| − | |||
| − | <td align=" | ||
| − | |||
| − | |||
| − | |||
| − | < | ||
| − | |||
| − | |||
| − | |||
| − | |||
| − | |||
| − | |||
| − | |||
| − | |||
| − | |||
| − | |||
| − | |||
| − | |||
| − | |||
| − | |||
| − | |||
| − | |||
| − | |||
| − | |||
| − | |||
| − | |||
| − | |||
| − | |||
| − | |||
| − | |||
| − | |||
| − | |||
| − | |||
| − | + | [[File:petphysical.gif|link=]][[File:petdistance.gif|link=]][[File:petmagic.gif|link=]][[File:petdmg.gif|link=]][[File:petmelee.gif|link=]]</center> | |
| − | + | </td> | |
| − | + | <td align="left" valign="top"></td> | |
| − | <td align=" | ||
</tr> | </tr> | ||
| − | |||
| − | |||
| − | |||
| − | |||
| − | |||
| − | |||
| − | |||
| − | |||
| − | |||
| − | |||
| − | |||
| − | |||
| − | |||
| − | |||
| − | |||
| − | |||
| − | |||
| − | |||
| − | |||
| − | |||
| − | |||
| − | |||
| − | |||
| − | |||
| − | |||
| − | |||
| − | |||
| − | |||
| − | |||
| − | |||
| − | |||
| − | |||
| − | |||
| − | |||
| − | |||
| − | |||
| − | |||
| − | |||
| − | |||
| − | |||
| − | |||
| − | |||
| − | |||
| − | |||
| − | |||
| − | |||
| − | |||
| − | |||
| − | |||
| − | |||
| − | |||
| − | |||
| − | |||
| − | |||
| − | |||
| − | |||
| − | |||
| − | |||
| − | |||
| − | |||
| − | |||
| − | |||
| − | |||
| − | |||
| − | |||
| − | |||
| − | |||
| − | |||
| − | |||
| − | |||
| − | |||
| − | |||
| − | |||
| − | |||
| − | |||
| − | |||
| − | |||
| − | |||
| − | |||
| − | |||
| − | |||
| − | |||
| − | |||
| − | |||
| − | |||
| − | |||
| − | |||
| − | |||
| − | |||
| − | |||
| − | |||
| − | |||
| − | |||
| − | |||
| − | |||
| − | |||
| − | |||
| − | |||
| − | |||
| − | |||
| − | |||
| − | |||
| − | |||
| − | |||
| − | |||
| − | |||
| − | |||
| − | |||
| − | |||
| − | |||
| − | |||
| − | |||
| − | |||
| − | |||
| − | |||
| − | |||
| − | |||
| − | |||
| − | |||
| − | |||
| − | |||
| − | |||
| − | |||
| − | |||
| − | |||
| − | |||
| − | |||
| − | |||
| − | |||
| − | |||
| − | |||
| − | |||
| − | |||
| − | |||
| − | |||
| − | |||
</table> | </table> | ||
| Line 303: | Line 86: | ||
2. Follow the maps below. | 2. Follow the maps below. | ||
| − | [[file:summer champion belathriel map.png]] | + | [[file:summer champion belathriel map.png|link=]] |
3. To face Winter Champion Lumithriel, pull the lever.<br> | 3. To face Winter Champion Lumithriel, pull the lever.<br> | ||
You can go either solo or with other 8 players.<br> | You can go either solo or with other 8 players.<br> | ||
| − | [[file:summer champion belathriel lever.gif]] | + | [[file:summer champion belathriel lever.gif|link=]] |
== Mechanics == | == Mechanics == | ||
| Line 315: | Line 98: | ||
So, make your way to dodge them, they last for like 5-10 seconds. | So, make your way to dodge them, they last for like 5-10 seconds. | ||
| − | [[file:summer champion belathriel hailstorm.gif]] | + | [[file:summer champion belathriel hailstorm.gif|link=]] |
=== Summer Crystal === | === Summer Crystal === | ||
| Line 321: | Line 104: | ||
This crystal doesn't attack, but summons monsters that does, just destroy them and it will be fine. | This crystal doesn't attack, but summons monsters that does, just destroy them and it will be fine. | ||
| − | [[file:summer champion belathriel summer crystal.gif]] | + | [[file:summer champion belathriel summer crystal.gif|link=]] |
Latest revision as of 23:11, 11 August 2026
Boss
To go back to bosses page, click here

Boss Info
 Classification: Archfoe
 Location: Summer Court
 Health: 5kk
 Experience: 15.8kk
Bosstiary Progress
 Prowess: 5 kills
 Expertise: 20 kills
 Mastery: 40 kills
Loot Table
|
|
|
|
|
|
     |


 3-6x crystal coin
 giant amethyst
 1-2x giant ruby
 1-2x giant emerald
 1-2x giant topaz
 giant sapphire
 1-16x ultimate mana potion
 1-16x ultimate spirit potion
 1-16x supreme health potion
 1-5x mastermind potion
 1-5x bullseye potion
 2-5x berserk potion


Location
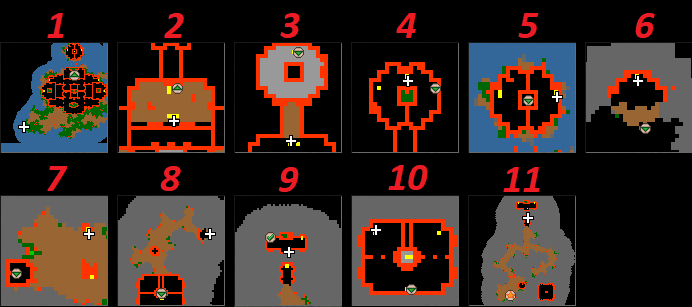
1. Take the waypoint to Shattered Sands - Summer Court
2. Follow the maps below.
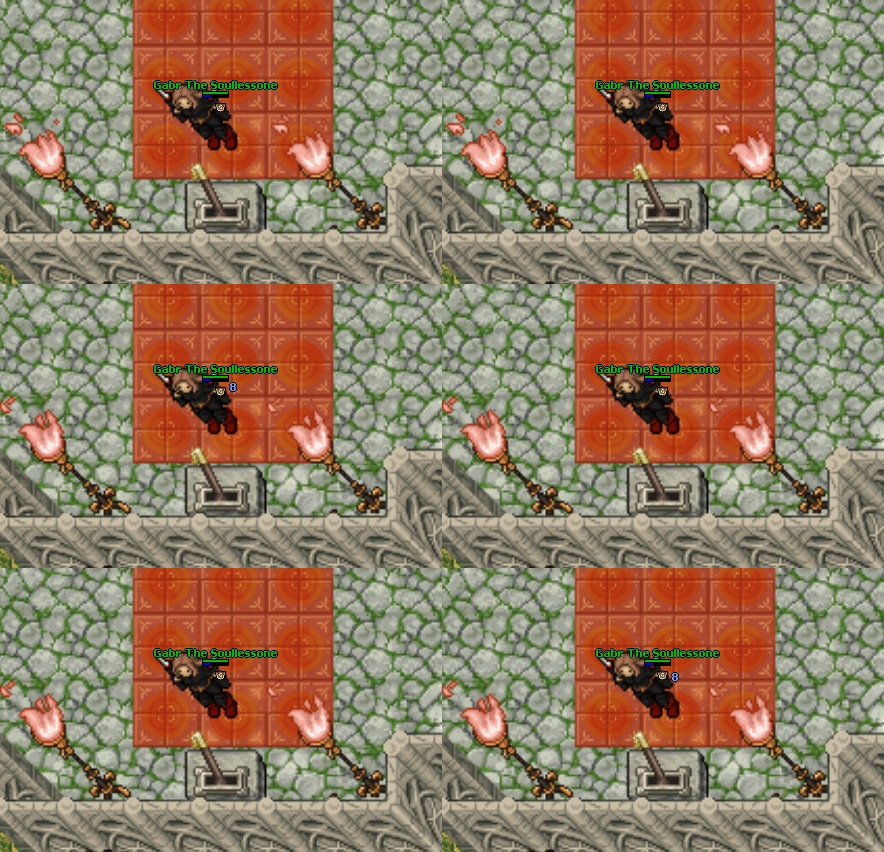
3. To face Winter Champion Lumithriel, pull the lever.
You can go either solo or with other 8 players.
Mechanics
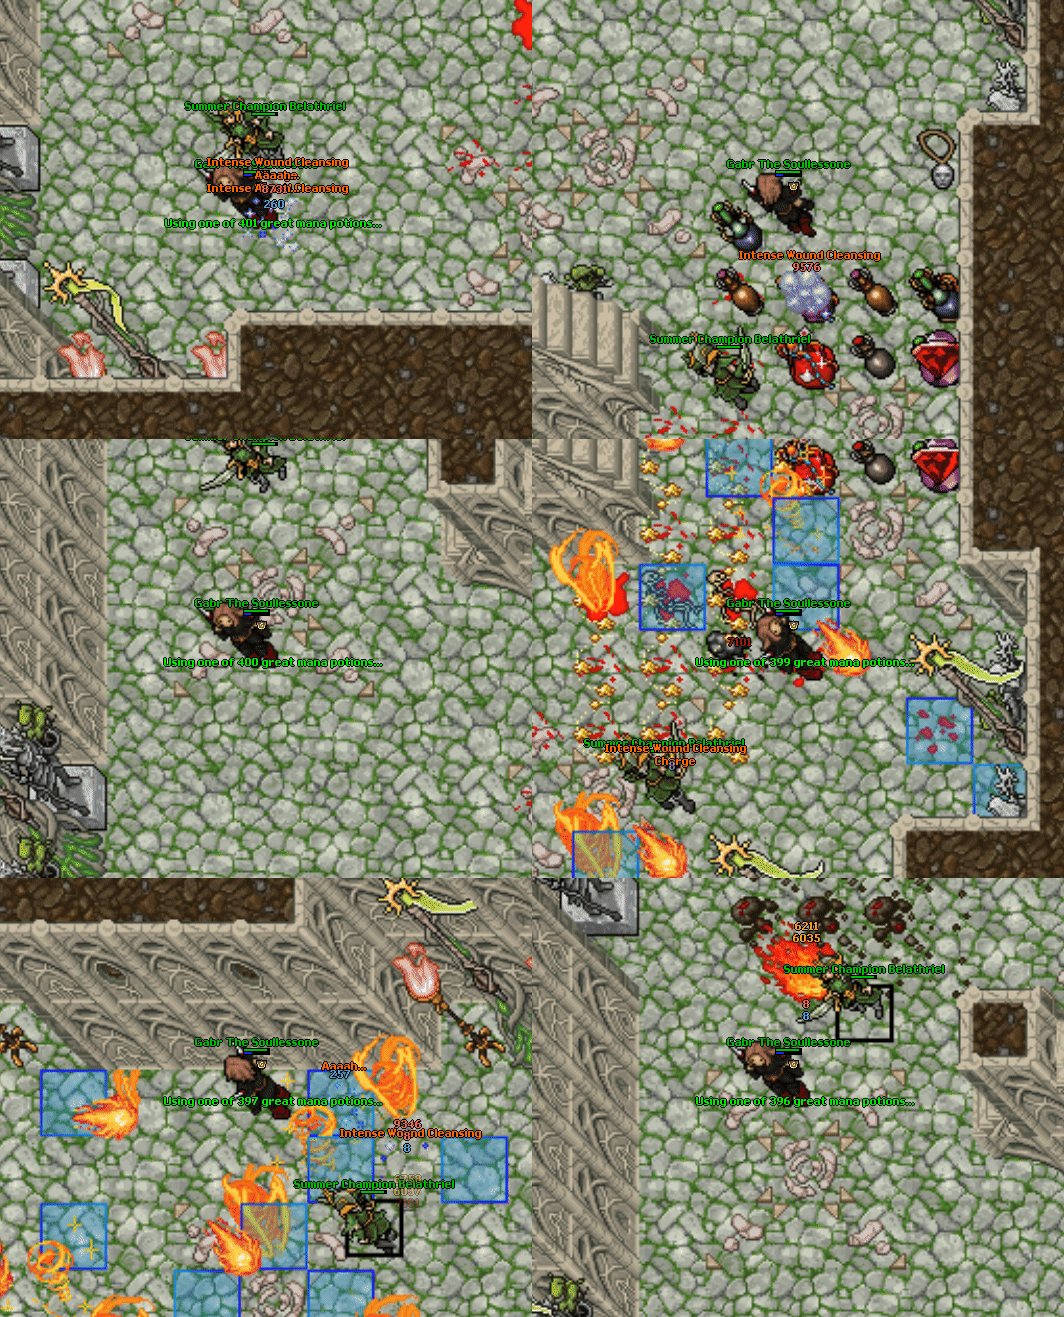
Firestorm
In here, some SQM's around the room will turn blue (deadly).
So, make your way to dodge them, they last for like 5-10 seconds.
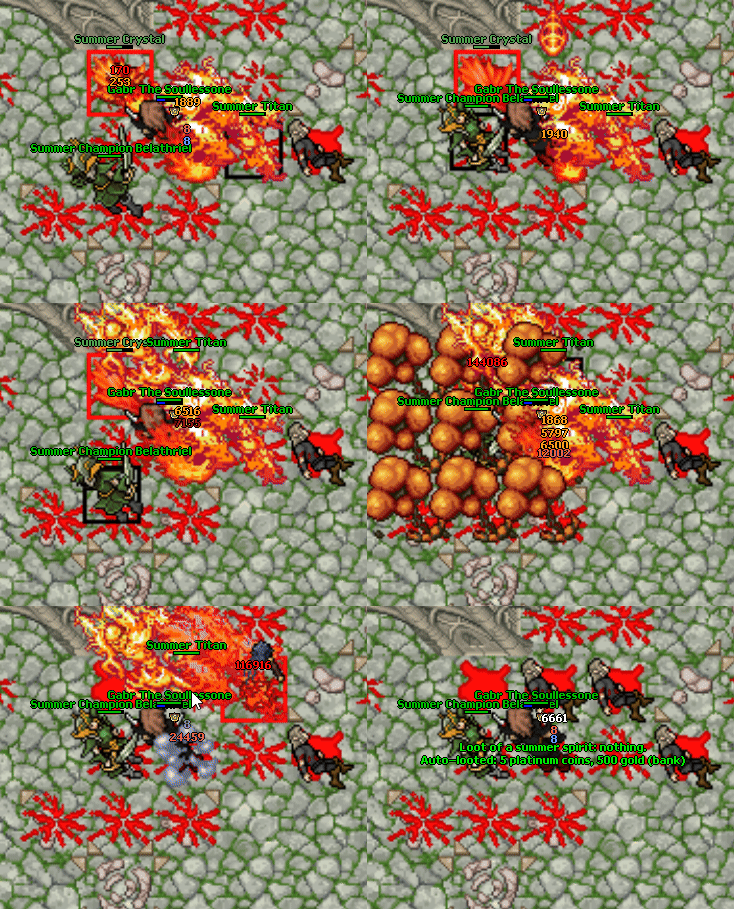
Summer Crystal
Sometimes, a Summer Crystal will spawn inside the room.
This crystal doesn't attack, but summons monsters that does, just destroy them and it will be fine.