Difference between revisions of "Grand Master Oberon"
| (11 intermediate revisions by the same user not shown) | |||
| Line 1: | Line 1: | ||
| − | == | + | == Boss == |
| − | <i>To go back to bosses page, [[Bosses|click here]]</i> | + | <i>To go back to bosses page, [[Bosses List|click here]]</i> |
<hr> | <hr> | ||
| − | [[File:Grand Master Oberon.gif]] | + | [[File:Grand Master Oberon.gif|link=]] |
| − | [[file:Bosstiary Bane.png]] Classification: Bane<br> | + | <b>Boss Info</b><br> |
| − | [[file:Speed Icon.gif]] Location: Falcon's Bastion<br> | + | [[file:Bosstiary Bane.png|link=]] Classification: Bane<br> |
| − | [[File:HP Icon.gif]] Health: 1.2kk<br> | + | [[file:Speed Icon.gif|link=]] Location: Falcon's Bastion<br> |
| − | [[File:XP Icon.gif]] Experience: 500k<br> | + | [[File:HP Icon.gif|link=]] Health: 1.2kk<br> |
| + | [[File:XP Icon.gif|link=]] Experience: 500k<br> | ||
| − | <b>Bosstiary Progress | + | <b>Bosstiary Progress</b><br> |
| + | [[file:Prowess Icon.gif|link=]] Prowess: 10 kills<br> | ||
| + | [[file:Expertise Icon.gif|link=]] Expertise: 30 kills<br> | ||
| + | [[file:Mastery Icon.gif|link=]] Mastery: 100 kills<br> | ||
| − | == | + | == Loot Table == |
<table class="wikitable sortable"> | <table class="wikitable sortable"> | ||
| − | |||
| − | |||
| − | |||
| − | |||
| − | |||
| − | |||
<tr> | <tr> | ||
| − | <td align=" | + | <td align="left" valign="top"> |
| − | + | <center>'''[[Items|Boss Items]]'''</center> | |
| − | + | [[File:Boss Coin2.gif|link=]] [[Boss Coin Shop|1-2x boss coin]]<br>[[File:Relic Chest.gif|link=]] [[Relics#Relic_List|relic chest]] | |
| − | + | [[File:Attunement Item 1.gif|alt=]] [[Soul Attunement|soul of grand master oberon]] | |
| − | |||
| − | |||
| − | |||
| − | + | [[File:Falcon Helmet.gif|link=]] [[Helmets|falcon helmet]]<br>[[File:Falcon Coif.gif|link=]] [[Helmets|falcon coif]] | |
| − | |||
| − | |||
| − | |||
| − | + | [[File:Falcon Circlet.gif|link=]] [[Helmets|falcon circlet]] | |
| − | |||
| − | |||
| − | |||
| − | + | [[File:Falcon Plate.gif|link=]] [[Armors|falcon plate]] | |
| − | |||
| − | |||
| − | |||
| − | + | [[File:Ghazbaran Oyoroi.gif|alt=]] [[Armors|ghazbaran oyoroi]]<br>[[File:Falcon Greaves.gif|link=]] [[Legs|falcon greaves]] | |
| − | |||
| − | |||
| − | |||
| − | + | [[File:Legs of Wisdom.gif|alt=]] [[Legs|legs of wisdom]] | |
| − | |||
| − | |||
| − | |||
| − | + | [[File:Falcon Boots.gif|link=]] [[Boots|falcon boots]] | |
| − | |||
| − | |||
| − | |||
| − | + | [[File:Falcon Wand.gif|link=]] [[Wands|falcon wand]]<br>[[File:Falcon Rod.gif|link=]] [[Rods|falcon rod]] | |
| − | |||
| − | |||
| − | |||
| − | + | [[File:Falcon Longbow.gif|link=]] [[Bows|falcon longbow]] | |
| − | |||
| − | |||
| − | |||
| − | + | [[File:Falcon Longsword.gif|link=]] [[Swords|falcon longsword]]<br>[[File:Falcon Battleaxe.gif|link=]] [[Axes|falcon battleaxe]] | |
| − | |||
| − | |||
| − | |||
| − | + | [[File:Falcon Mace.gif|link=]] [[Clubs|falcon mace]] | |
| − | |||
| − | |||
| − | |||
| − | + | [[File:Falcon Sai.gif|link=]] [[Fists|falcon sai]] | |
| − | |||
| − | |||
| − | |||
| − | < | + | </td> |
| − | <td align="center | + | <td align="left" valign="top"> |
| − | + | <center>'''[[Jewelry]]'''</center> | |
| − | + | [[File:Gold Coin.gif|link=]]1-100x gold coin | |
| − | + | [[File:Blue Gem.gif|link=]]blue gem | |
| − | |||
| − | |||
| − | |||
| − | + | [[File:Gold Ingot.gif|link=]]gold ingot | |
| − | + | </td> | |
| − | <td align=" | + | <td align="left" valign="top"> |
| − | < | + | <center>'''Other Items'''</center> |
| + | [[File:Bone.gif|link=]] bone | ||
| − | + | [[File:Brass Shield.gif|link=]] brass shield | |
| − | |||
| − | |||
| − | |||
| − | + | [[File:Viking Helmet.gif|link=]] viking helmet | |
| − | |||
| − | |||
| − | |||
| − | + | [[File:Hatchet.gif|link=]]hatchet | |
| − | |||
| − | |||
| − | |||
| + | [[File:Mace.gif|link=]] mace | ||
| + | </td> | ||
| + | </tr> | ||
<tr> | <tr> | ||
| − | <td align="center | + | <td align="left" valign="top"> |
| − | <td align="center | + | <center>[[Gem Atelier|'''Gems''']]<br> |
| − | <td align=" | + | [[File:Lesser Marksman Gem.gif|link=]][[File:Lesser Mystic Gem.gif|link=]][[File:Lesser Sage Gem.gif|link=]][[File:Lesser Guardian Gem.gif|link=]][[File:Lesser Spiritualist Gem.gif|link=]][[File:Lesser Ninja Gem.gif|link=]]</center> |
| + | </td> | ||
| + | <td align="left" valign="top"> | ||
| + | <center>[[Pet Upgrading#Boosts|'''Pet Boost Tokens''']] | ||
| + | [[File:petice.gif|link=]][[File:petdeath.gif|link=]][[File:petholy.gif|link=]][[File:petfire.gif|link=]][[File:petenergy.gif|link=]][[File:petearth.gif|link=]]<br> | ||
| + | [[File:petphysical.gif|link=]][[File:petdistance.gif|link=]][[File:petmagic.gif|link=]][[File:petdmg.gif|link=]][[File:petmelee.gif|link=]]</center> | ||
| + | </td> | ||
| + | <td align="left" valign="top"></td> | ||
| + | </tr> | ||
| + | </table> | ||
| − | + | == Location == | |
| − | + | <b><u>Requires level 500</u></b> | |
| − | |||
| − | |||
| − | |||
| − | |||
| − | |||
| − | |||
| − | |||
| − | |||
| − | |||
| − | |||
| − | |||
| − | |||
| − | |||
| − | |||
| − | |||
| − | |||
| − | |||
| − | |||
| − | |||
| − | |||
| − | |||
| − | |||
| − | |||
| − | |||
| − | |||
| − | |||
| − | |||
| − | |||
| − | |||
| − | |||
| − | |||
| − | |||
| − | |||
| − | |||
| − | |||
| − | |||
| − | |||
| − | |||
| − | |||
| − | |||
| − | |||
| − | |||
| − | |||
| − | |||
| − | |||
| − | |||
| − | |||
| − | |||
| − | |||
| − | |||
| − | |||
| − | |||
| − | |||
| − | |||
| − | |||
| − | |||
| − | |||
| − | |||
| − | |||
| − | |||
| − | |||
| − | |||
| − | |||
| − | |||
| − | |||
| − | < | ||
| − | |||
| − | |||
| − | |||
| − | |||
| − | |||
| − | |||
| − | |||
| − | |||
| − | |||
| − | |||
| − | |||
| − | |||
| − | </ | ||
| − | + | 1. Take the waypoint to <b><i>[[Waypoint System#Nevada|Nevada - Falcon's Bastion]]</b></i> | |
| − | 1. Take the waypoint to <b><i>Nevada - Falcon's Bastion</b></i> | ||
2. Follow the maps. | 2. Follow the maps. | ||
* On map 3, go down twice. | * On map 3, go down twice. | ||
| − | [[file:grand master oberon map.png]] | + | [[file:grand master oberon map.png|link=]] |
3. To face Grand Master Oberon, pull the lever. | 3. To face Grand Master Oberon, pull the lever. | ||
You can go either solo or with other 4 players. | You can go either solo or with other 4 players. | ||
| − | [[file:grand master oberon lever.gif]] | + | [[file:grand master oberon lever.gif|link=]] |
== Mechanics == | == Mechanics == | ||
| − | There are 4 Crystal Lamps [[file:Crystal Lamp.gif]] around the room pulsing 0/5 stacks. | + | There are 4 Crystal Lamps [[file:Crystal Lamp.gif|link=]] around the room pulsing 0/5 stacks. |
| − | * Every second, there will be an Energy Field [[file:Energy Effect.gif]] in every SQM around it. | + | * Every second, there will be an Energy Field [[file:Energy Effect.gif|link=]] in every SQM around it. |
* You must step on the SQM to decrease one stack of it. | * You must step on the SQM to decrease one stack of it. | ||
* If the crystal lamp gets 5 stacks, a Falcon will be summoned to the room. | * If the crystal lamp gets 5 stacks, a Falcon will be summoned to the room. | ||
| Line 225: | Line 108: | ||
Repeat it all until the boss is killed. | Repeat it all until the boss is killed. | ||
| − | [[file:grand master oberon boss.gif]] | + | [[file:grand master oberon boss.gif|link=]] |
Latest revision as of 23:02, 11 August 2026
Boss
To go back to bosses page, click here

Boss Info
 Classification: Bane
 Location: Falcon's Bastion
 Health: 1.2kk
 Experience: 500k
Bosstiary Progress
 Prowess: 10 kills
 Expertise: 30 kills
 Mastery: 100 kills
Loot Table
|
|
|
|
      |
     |


 1-100x gold coin
 blue gem
 gold ingot
 bone
bone
 brass shield
 viking helmet
 hatchet
 mace
mace


Location
Requires level 500
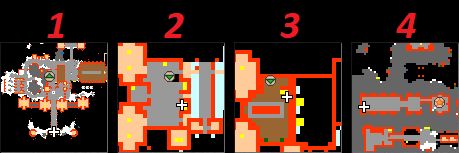
1. Take the waypoint to Nevada - Falcon's Bastion
2. Follow the maps.
- On map 3, go down twice.
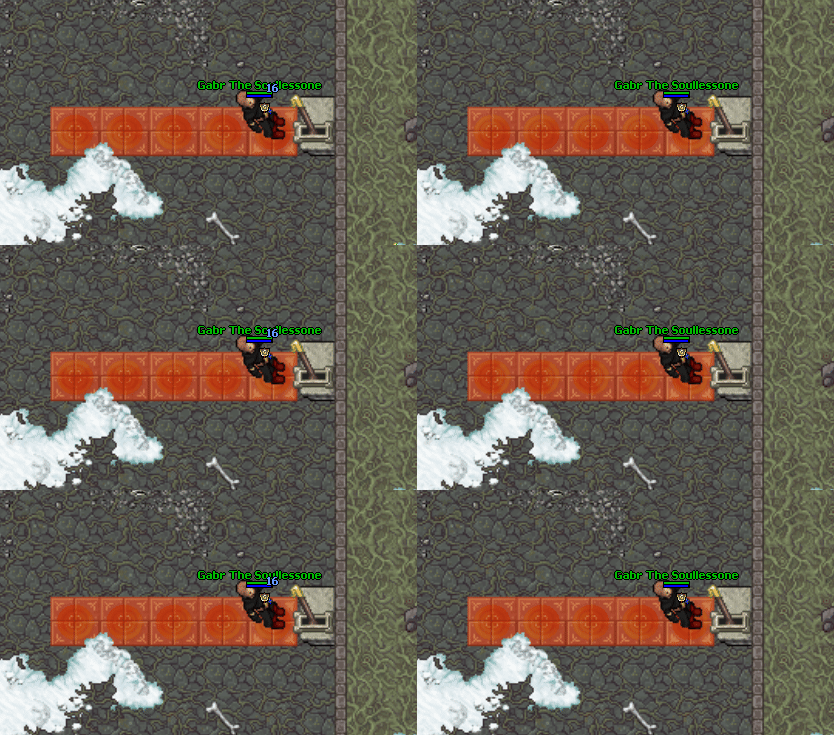
3. To face Grand Master Oberon, pull the lever. You can go either solo or with other 4 players.
Mechanics
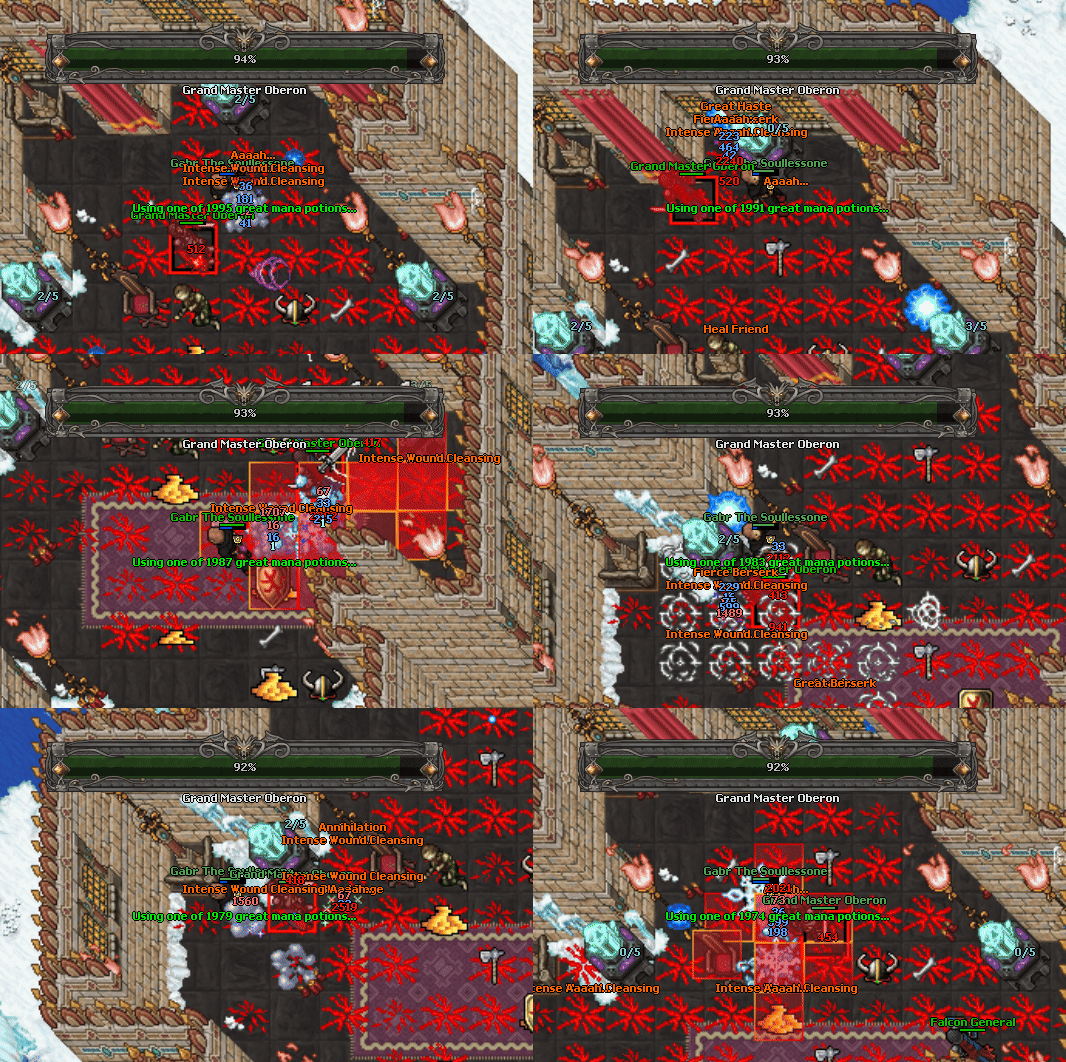
There are 4 Crystal Lamps  around the room pulsing 0/5 stacks.
- Every second, there will be an Energy Field
 in every SQM around it.
 - You must step on the SQM to decrease one stack of it.
- If the crystal lamp gets 5 stacks, a Falcon will be summoned to the room.
It is not mandatory to prevent the mobs from spawning since they're not immune to damage.
You can just ignore them focusing on the boss, it is up to you.
Repeat it all until the boss is killed.