Difference between revisions of "Drume"
| (18 intermediate revisions by the same user not shown) | |||
| Line 1: | Line 1: | ||
| − | == | + | == Boss == |
| − | <i>To go back to bosses page, [[Bosses|click here]]</i> | + | <i>To go back to bosses page, [[Bosses List|click here]]</i> |
<hr> | <hr> | ||
| − | [[File:Drume.gif]] | + | [[File:Drume.gif|link=]] |
| − | [[file:Bosstiary Bane.png]] Classification: Bane<br> | + | <b>Boss Info</b><br> |
| − | [[file:Speed Icon.gif]] Location: [[Drume Walkthrough|Lion's Bastion]]<br> | + | [[file:Bosstiary Bane.png|link=]] Classification: Bane<br> |
| − | [[File:HP Icon.gif]] Health: 680k<br> | + | [[file:Speed Icon.gif|link=]] Location: [[Drume Walkthrough|Lion's Bastion]]<br> |
| − | [[File:XP Icon.gif]] Experience: 6.9k<br> | + | [[File:HP Icon.gif|link=]] Health: 680k<br> |
| + | [[File:XP Icon.gif|link=]] Experience: 6.9k<br> | ||
| − | <b>Bosstiary Progress | + | <b>Bosstiary Progress</b><br> |
| + | [[file:Prowess Icon.gif|link=]] Prowess: 10 kills<br> | ||
| + | [[file:Expertise Icon.gif|link=]] Expertise: 30 kills<br> | ||
| + | [[file:Mastery Icon.gif|link=]] Mastery: 100 kills<br> | ||
== Loot Table == | == Loot Table == | ||
<table class="wikitable sortable"> | <table class="wikitable sortable"> | ||
| − | |||
| − | |||
| − | |||
| − | |||
| − | |||
| − | |||
| − | |||
| − | |||
| − | |||
| − | |||
| − | |||
| − | |||
| − | |||
| − | |||
| − | |||
| − | |||
| − | |||
| − | |||
| − | |||
| − | |||
| − | |||
| − | |||
| − | |||
| − | |||
| − | |||
| − | |||
| − | |||
| − | |||
| − | |||
| − | |||
| − | |||
| − | |||
| − | |||
| − | |||
| − | |||
| − | |||
| − | |||
| − | |||
| − | |||
| − | |||
| − | |||
| − | |||
| − | |||
| − | |||
| − | |||
| − | |||
| − | |||
| − | |||
| − | |||
| − | |||
| − | |||
| − | |||
| − | |||
| − | |||
| − | |||
| − | |||
| − | |||
| − | |||
| − | |||
| − | |||
| − | |||
| − | |||
| − | |||
| − | |||
| − | |||
| − | |||
| − | |||
| − | |||
| − | |||
| − | |||
| − | |||
| − | |||
| − | |||
| − | |||
| − | |||
| − | |||
| − | |||
| − | |||
| − | |||
| − | |||
| − | |||
| − | |||
| − | |||
| − | |||
| − | |||
| − | |||
| − | |||
| − | |||
| − | |||
| − | |||
| − | |||
| − | |||
| − | |||
| − | |||
| − | |||
| − | |||
| − | |||
| − | |||
| − | |||
| − | |||
| − | |||
| − | |||
| − | |||
| − | |||
| − | |||
| − | |||
| − | |||
| − | |||
| − | |||
| − | |||
| − | |||
<tr> | <tr> | ||
| − | <td align="center | + | <td align="left" valign="top"> |
| − | + | <center>'''[[Items|Boss Items]]'''</center> | |
| − | + | [[File:Boss Coin2.gif|link=]] [[Boss Coin Shop|1-2x boss coin]]<br>[[File:Relic Chest.gif|link=]] [[Relics#Relic_List|relic chest]] | |
| − | + | [[File:Attunement Item 1.gif|alt=]] [[Soul Attunement|soul of drume]] | |
| − | |||
| − | |||
| − | |||
| − | + | [[File:Lion Spangenhelm.gif|link=]] [[Helmets|lion spangenhelm]]<br>[[File:Lion Plate.gif|link=]] [[Armors|lion plate]] | |
| − | |||
| − | |||
| − | |||
| − | + | [[File:Zaoan Monk Robe.gif|alt=]] [[Armors|zaoan monk robe]] | |
| − | |||
| − | |||
| − | |||
| − | + | [[File:Lion Legs.gif|link=]] [[Legs|lion legs]] | |
| − | |||
| − | |||
| − | |||
| − | + | [[File:Lion Boots.gif|link=]] [[Boots|ix footwraps]] | |
| − | |||
| − | |||
| − | |||
| − | + | [[File:Lion Shield.gif|link=]] [[Shields|lion shield]]<br>[[File:Lion Spellbook.gif|link=]] [[Spellbooks|lion spellbook]] | |
| − | |||
| − | |||
| − | |||
| − | + | [[File:Lion Amulet.gif|link=]] [[Amulets|lion amulet]] | |
| − | |||
| − | |||
| − | |||
| − | + | [[File:Lion Ring.gif|link=]] [[Rings|lion ring]] | |
| − | |||
| − | |||
| − | |||
| − | + | [[File:Lion Wand.gif|link=]] [[Wands|lion wand]] | |
| − | |||
| − | |||
| − | |||
| − | |||
| − | |||
| − | |||
| − | |||
| − | |||
| − | + | [[File:Lion Rod.gif|link=]] [[Rods|lion rod]]<br>[[File:Lion Longbow.gif|link=]] [[Bows|lion longbow]] | |
| − | |||
| − | |||
| − | |||
| − | + | [[File:Lion Longsword.gif|link=]] [[Swords|lion longsword]] | |
| − | |||
| − | |||
| − | |||
| − | + | [[File:Lion Axe.gif|link=]] [[Axes|lion axe]]<br>[[File:Lion Hammer.gif|link=]] [[Clubs|lion hammer]] | |
| − | |||
| − | |||
| − | |||
| − | + | [[File:Lion Blade.gif|link=]][[Daggers|lion blade]]<br>[[File:Lion Claws.gif|link=]][[Fists|lion claws]] | |
| − | + | </td> | |
| − | <td align=" | + | <td align="left" valign="top"> |
| − | < | + | <center>'''[[Jewelry]]'''</center> |
| + | [[File:Platinum Coin.gif|alt=]] 1-100x platinum coin | ||
| − | + | [[File:Blue Gem.gif|link=]]blue gem | |
| − | |||
| − | |||
| − | |||
| + | [[File:Gold Ingot.gif|link=]]gold ingot | ||
| + | </td> | ||
| + | <td align="left" valign="top"> | ||
| + | <center>'''[[Liquids]]'''</center> | ||
| + | [[File:Ultimate Mana Potion.gif|link=]] 1-32x ultimate mana potion<br> | ||
| + | [[File:Ultimate Spirit Potion.gif|link=]] 1-11x ultimate spirit potion<br> | ||
| + | [[File:Supreme Health Potion.gif|link=]] 1-37x supreme health potion<br> | ||
| + | [[File:Mastermind Potion.gif|link=]] 1-17x mastermind potion<br> | ||
| + | [[File:Bullseye Potion.gif|link=]] 1-19x bullseye potion<br> | ||
| + | [[File:Berserk Potion.gif|link=]] 2-19x berserk potion | ||
| + | </td> | ||
| + | </tr> | ||
<tr> | <tr> | ||
| − | <td align="center | + | <td align="left" valign="top"> |
| − | <td align="center | + | <center>[[Gem Atelier|'''Gems''']]<br> |
| − | <td align="center | + | [[File:Lesser Marksman Gem.gif|link=]][[File:Lesser Mystic Gem.gif|link=]][[File:Lesser Sage Gem.gif|link=]][[File:Lesser Guardian Gem.gif|link=]][[File:Lesser Spiritualist Gem.gif|link=]][[File:Lesser Ninja Gem.gif|link=]]</center> |
| + | </td> | ||
| + | <td align="left" valign="top"> | ||
| + | <center>[[Pet Upgrading#Boosts|'''Pet Boost Tokens''']] | ||
| + | [[File:petice.gif|link=]][[File:petdeath.gif|link=]][[File:petholy.gif|link=]][[File:petfire.gif|link=]][[File:petenergy.gif|link=]][[File:petearth.gif|link=]]<br> | ||
| + | [[File:petphysical.gif|link=]][[File:petdistance.gif|link=]][[File:petmagic.gif|link=]][[File:petdmg.gif|link=]][[File:petmelee.gif|link=]]</center> | ||
| + | </td> | ||
| + | <td align="left" valign="top"> | ||
| + | <center>'''Other Items'''</center> | ||
| + | [[File:Mace.gif|link=]] 1-2x mace | ||
| − | + | [[File:Silver Token.gif|link=]]1-5x silver token | |
| − | |||
| − | |||
| − | |||
| − | + | [[File:Stone Skin Amulet.gif|link=]]stone skin amulet | |
| − | |||
| − | |||
| − | |||
| − | + | [[File:Terra Mantle.gif|link=]]terra mantle<br>[[File:Terra Hood.gif|link=]]terra hood | |
| − | |||
| − | |||
| − | |||
| − | + | [[File:Terra Amulet.gif|link=]]terra amulet | |
| − | |||
| − | |||
| − | |||
| − | + | [[File:Underworld Rod.gif|link=]][[Rods|underworld rod]] | |
| − | |||
| − | |||
| − | |||
| − | + | [[File:Terra Rod.gif|link=]][[Rods|terra rod]] | |
| − | |||
| − | |||
| − | |||
| − | |||
| − | |||
| − | |||
| − | |||
| − | |||
| − | |||
| − | |||
| − | |||
| − | |||
| − | |||
| − | |||
| − | |||
| − | |||
| − | |||
| − | |||
| − | |||
| − | |||
| − | |||
| − | |||
| − | |||
| − | |||
| − | |||
| − | |||
| − | |||
| − | |||
| − | |||
| − | |||
| − | |||
| − | |||
| − | |||
| − | |||
| − | |||
| − | |||
| − | |||
| − | |||
| − | |||
| − | |||
| − | |||
| − | |||
| − | |||
| − | |||
| − | |||
| − | |||
| − | |||
| − | |||
| − | |||
| − | |||
| − | |||
| − | |||
| − | |||
| + | [[File:Wand of Voodoo.gif|link=]] [[Wands|wand of voodoo]] | ||
| + | </td> | ||
| + | </tr> | ||
</table> | </table> | ||
== Location == | == Location == | ||
| − | 1. Take the waypoint to <b><i>Mainland - Lion's Bastion</b></i> | + | <b></u>Requires Level 50<br>Requires [[The Order of the Lion Quest]]</u></b> |
| + | |||
| + | 1. Take the waypoint to <b><i>[[Waypoint System#Mainland|Mainland - Lion's Bastion]]</b></i> | ||
2. Follow the maps below. | 2. Follow the maps below. | ||
| − | [[file:drume_map_1.png]] | + | [[file:drume_map_1.png|link=]] |
3. Pass through the teleporter and pull the lever.<br> | 3. Pass through the teleporter and pull the lever.<br> | ||
You can go either solo or with other 4 players. | You can go either solo or with other 4 players. | ||
| − | [[file:drume lever.gif]] | + | [[file:drume lever.gif|link=]] |
== Mechanics == | == Mechanics == | ||
Drume will summon Corrupted Lion Commanders over time.<br> | Drume will summon Corrupted Lion Commanders over time.<br> | ||
| − | Lure them to the divine empowerments on the ground and they will despawn. [[file:Divine Empowerment Effect2.gif]] | + | Lure them to the divine empowerments on the ground and they will despawn. [[file:Divine Empowerment Effect2.gif|link=]] |
Having more than 2 Corrupted Lion Commanders, will turn Drume into an Enraged Drume.<br> | Having more than 2 Corrupted Lion Commanders, will turn Drume into an Enraged Drume.<br> | ||
| Line 313: | Line 121: | ||
Repeat it all until the boss is killed. | Repeat it all until the boss is killed. | ||
| − | [[file:drume boss.gif]] | + | [[file:drume boss.gif|link=]] |
Latest revision as of 23:01, 11 August 2026
Boss
To go back to bosses page, click here

Boss Info
 Classification: Bane
 Location: Lion's Bastion
 Health: 680k
 Experience: 6.9k
Bosstiary Progress
 Prowess: 10 kills
 Expertise: 30 kills
 Mastery: 100 kills
Loot Table
|
|
|
|
      |
     |
|


 blue gem
 gold ingot
 1-32x ultimate mana potion
 1-11x ultimate spirit potion
 1-37x supreme health potion
 1-17x mastermind potion
 1-19x bullseye potion
 2-19x berserk potion


 1-2x mace
 1-5x silver token
 stone skin amulet
 terra mantle
 terra hood
 terra amulet


Location
Requires Level 50
Requires The Order of the Lion Quest
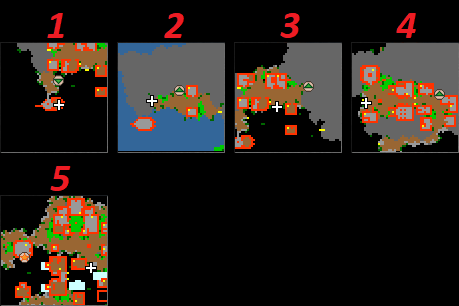
1. Take the waypoint to Mainland - Lion's Bastion
2. Follow the maps below.
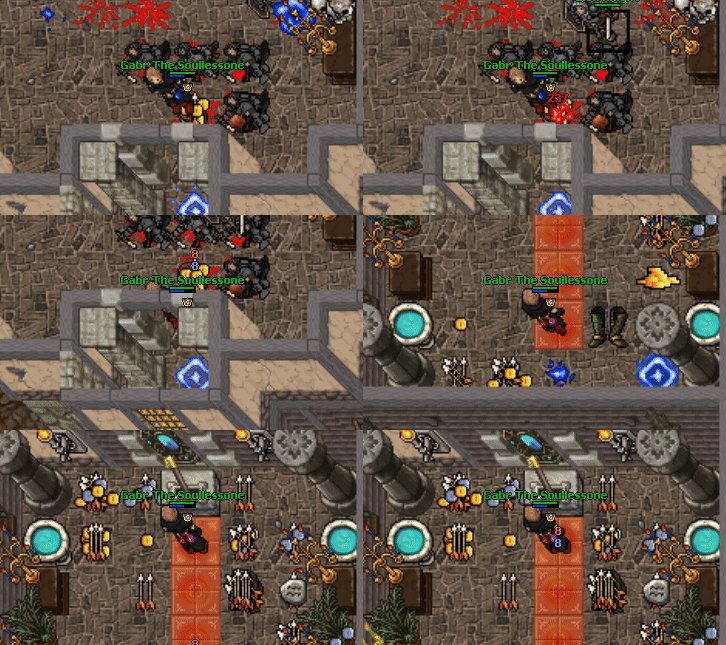
3. Pass through the teleporter and pull the lever.
You can go either solo or with other 4 players.
Mechanics
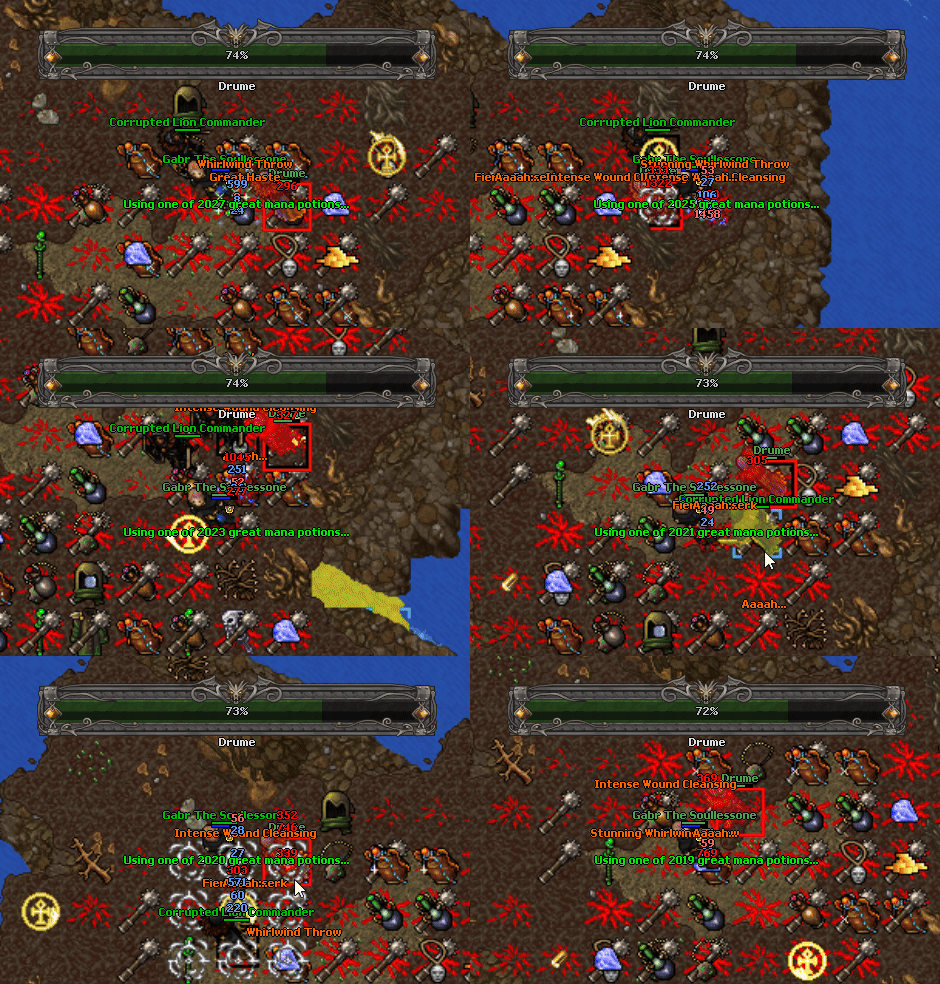
Drume will summon Corrupted Lion Commanders over time.
Lure them to the divine empowerments on the ground and they will despawn. 
Having more than 2 Corrupted Lion Commanders, will turn Drume into an Enraged Drume.
Enraged Drume will start casting regular boss mechanics until you lure the Commanders to the divine empowerments.
Once they despawn, Enraged Drume will turn into Drume again.
Repeat it all until the boss is killed.