Difference between revisions of "Dracola"
| (9 intermediate revisions by the same user not shown) | |||
| Line 1: | Line 1: | ||
== Boss == | == Boss == | ||
| − | <i>To go back to bosses page, [[ | + | <i>To go back to bosses page, [[Bosses_List|click here]]</i> |
<hr> | <hr> | ||
[[File:Cursed Dragon.gif|link=]] | [[File:Cursed Dragon.gif|link=]] | ||
| Line 19: | Line 19: | ||
<tr> | <tr> | ||
<td align="left" valign="top"> | <td align="left" valign="top"> | ||
| − | <center>'''[[Items|Boss | + | <center>'''[[Items|Boss Items]]'''</center> |
| + | [[File:Dracola's Eye.gif|link=]] [[Creature Products|dracola's eye]]<br> | ||
[[File:Boss Coin2.gif|link=]] [[Boss Coin Shop|boss coin]]<br> | [[File:Boss Coin2.gif|link=]] [[Boss Coin Shop|boss coin]]<br> | ||
| + | [[File:Attunement Item 1.gif|link=]] [[Soul Attunement|soul of dracola]]<br> | ||
[[File:Relic Chest.gif|link=]] [[Relics#Relic_List|relic chest]]<br> | [[File:Relic Chest.gif|link=]] [[Relics#Relic_List|relic chest]]<br> | ||
| − | [[File:Dracola | + | [[File:Dracola Helmet.gif|link=]] [[Helmets|dracola helmet]] |
| − | + | ||
| − | |||
| − | |||
[[File:Dracola Armor.gif|link=]] [[Armors|dracola armor]]<br> | [[File:Dracola Armor.gif|link=]] [[Armors|dracola armor]]<br> | ||
| − | [[File:Dracola | + | [[File:Dracola Legs.gif|link=]] [[Legs|dracola legs]] |
| + | |||
| + | [[File:Dracola Boots.gif|link=]] [[Boots|dracola boots]] | ||
| + | |||
| + | [[File:Dracola Shield.gif|link=]] [[Shields|dracola shield]] | ||
| + | |||
| + | [[File:Dracola Backpack.gif|link=]] [[Backpacks|dracola backpack]] | ||
</td> | </td> | ||
<td align="left" valign="top"> | <td align="left" valign="top"> | ||
| − | <center>''' | + | <center>'''[[Jewelry]]'''</center> |
| − | + | [[File:Platinum Coin.gif|link=]] 20-100x platinum coin | |
| − | [[File:Platinum Coin.gif|link=]] 20-100x platinum coin | + | |
| − | + | [[File:Blue Gem.gif|link=]] blue gem<br> | |
| − | + | [[File:Gold Ingot.gif|link=]] gold ingot | |
| − | |||
| − | [[File: | ||
| − | [[File: | ||
</td> | </td> | ||
<td align="left" valign="top"> | <td align="left" valign="top"> | ||
| Line 55: | Line 58: | ||
</td> | </td> | ||
<td align="left" valign="top"> | <td align="left" valign="top"> | ||
| − | <center>[[Pet Upgrading|'''Pet Boost Tokens''']] | + | <center>[[Pet Upgrading#Boosts|'''Pet Boost Tokens''']] |
[[File:petice.gif|link=]][[File:petdeath.gif|link=]][[File:petholy.gif|link=]][[File:petfire.gif|link=]][[File:petenergy.gif|link=]][[File:petearth.gif|link=]]<br> | [[File:petice.gif|link=]][[File:petdeath.gif|link=]][[File:petholy.gif|link=]][[File:petfire.gif|link=]][[File:petenergy.gif|link=]][[File:petearth.gif|link=]]<br> | ||
[[File:petphysical.gif|link=]][[File:petdistance.gif|link=]][[File:petmagic.gif|link=]][[File:petdmg.gif|link=]][[File:petmelee.gif|link=]]</center> | [[File:petphysical.gif|link=]][[File:petdistance.gif|link=]][[File:petmagic.gif|link=]][[File:petdmg.gif|link=]][[File:petmelee.gif|link=]]</center> | ||
</td> | </td> | ||
<td align="left" valign="top"> | <td align="left" valign="top"> | ||
| − | <center>''' | + | <center>'''Other Items'''</center> |
| − | [[File: | + | [[File:Mace.gif|link=]] 1-2x mace<br> |
| − | [[File: | + | [[File:Stone Skin Amulet.gif|link=]] stone skin amulet<br> |
| + | [[File:Underworld Rod.gif|link=]] underworld rod<br> | ||
| + | [[File:Terra Rod.gif|link=]] terra rod<br> | ||
| + | [[File:Wand of Voodoo.gif|link=]] wand of voodoo | ||
</td> | </td> | ||
</tr> | </tr> | ||
Revision as of 22:58, 11 August 2026
Boss
To go back to bosses page, click here

Boss Info
 Classification: Bane
 Location: Glacierbone Caves
 Health: 286k
 Experience: 11k
Bosstiary Progress
 Prowess: 10 kills
 Expertise: 30 kills
 Mastery: 100 kills
Loot Table
|
|
|
|
      |
     |
|


 20-100x platinum coin
 blue gem
 gold ingot
 1-19x ultimate mana potion
 1-11x ultimate spirit potion
 1-12x supreme health potion
 1-3x mastermind potion
 1-3x bullseye potion
 1-3x berserk potion


 1-2x mace
 stone skin amulet
 underworld rod
 terra rod
 wand of voodoo
Location
Requires level 150
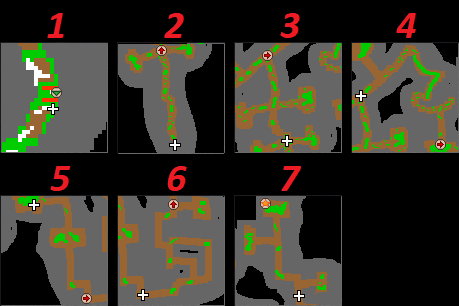
1. Take the waypoint to Nevada - Glacierbone Cave
2. Follow the map, then enter on the teleport to the second part.
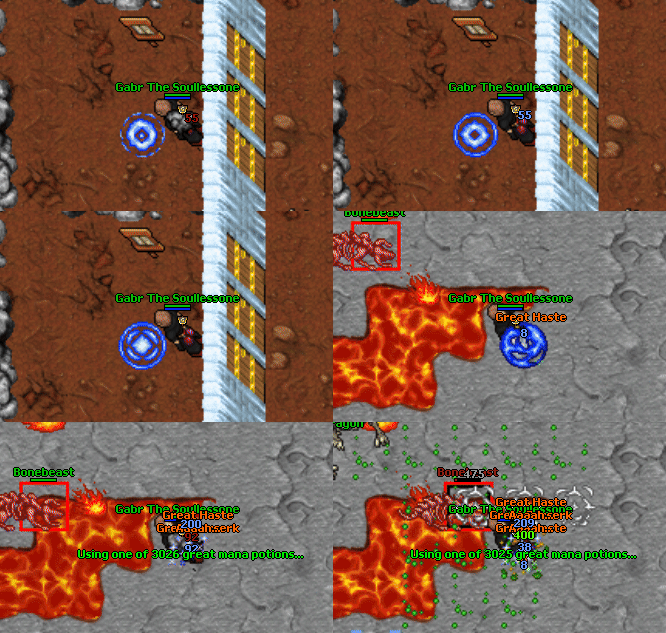
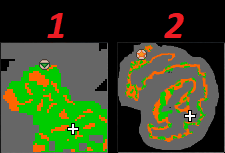
3. On this part you'll take damage from stepping on the lava, so be careful.
Follow the map.
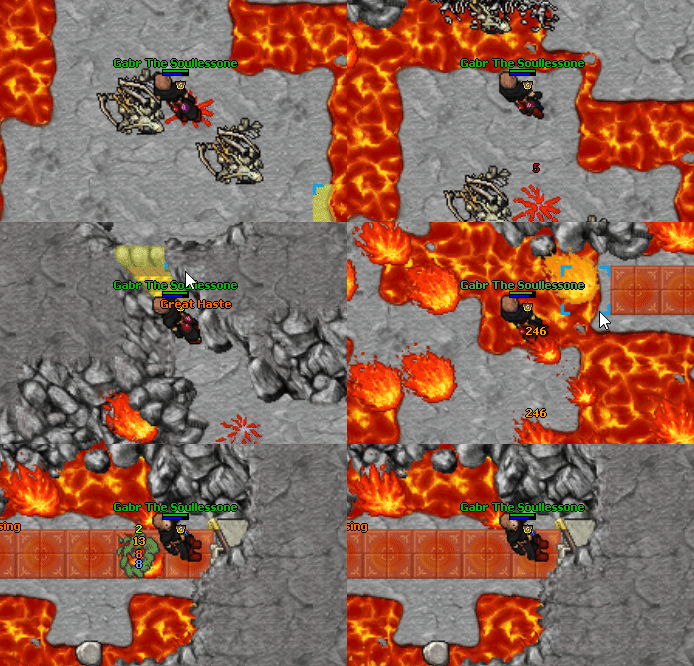
4. Pass through the door of expertise for level 150 and pull the lever.
You can go either solo or with other 4 players.
Mechanics
This boss has no special mechanics.