Difference between revisions of "Obujos"
| (11 intermediate revisions by the same user not shown) | |||
| Line 1: | Line 1: | ||
== Boss == | == Boss == | ||
| − | <i>To go back to bosses page, [[Bosses|click here]]</i> | + | <i>To go back to bosses page, [[Bosses List|click here]]</i> |
<hr> | <hr> | ||
| − | [[File:Obujos.gif]] | + | [[File:Obujos.gif|link=]] |
| − | [[file:Bosstiary Bane.png]] Classification: Bane<br> | + | <b>Boss Info</b><br> |
| − | [[file:Speed Icon.gif]] Location: Aurora Deeplings<br> | + | [[file:Bosstiary Bane.png|link=]] Classification: Bane<br> |
| − | [[File:HP Icon.gif]] Health: 185k<br> | + | [[file:Speed Icon.gif|link=]] Location: Aurora Deeplings<br> |
| − | [[File:XP Icon.gif]] Experience: 20k<br> | + | [[File:HP Icon.gif|link=]] Health: 185k<br> |
| + | [[File:XP Icon.gif|link=]] Experience: 20k<br> | ||
| − | <b>Bosstiary Progress | + | <b>Bosstiary Progress</b><br> |
| + | [[file:Prowess Icon.gif|link=]] Prowess: 10 kills<br> | ||
| + | [[file:Expertise Icon.gif|link=]] Expertise: 30 kills<br> | ||
| + | [[file:Mastery Icon.gif|link=]] Mastery: 100 kills<br> | ||
| + | |||
| + | == Loot Table == | ||
| − | |||
<table class="wikitable sortable"> | <table class="wikitable sortable"> | ||
| − | |||
| − | |||
| − | |||
| − | |||
| − | |||
| − | |||
<tr> | <tr> | ||
| − | <td align=" | + | <td align="left" valign="top"> |
| − | + | <center>'''[[Items|Boss Items]]'''</center>[[File:Attunement Item 1.gif|alt=]] [[Soul Attunement|soul of obujos]] | |
| − | |||
| − | |||
| − | + | [[File:Trophy of Obujos.gif|link=]][[Creature Products|trophy of obujos]] | |
| − | |||
| − | |||
| − | |||
| − | |||
| − | + | [[File:Depth Scutum.gif|link=]] [[Spellbooks|depth scutum]] | |
| − | |||
| − | |||
| − | |||
| − | |||
| − | + | [[File:Warrior's Shield.gif|link=]] [[Shields|warrior's shield]] | |
| − | |||
| − | |||
| − | |||
| − | |||
| − | + | [[File:Heavy Trident.gif|link=]] [[Swords|heavy trident]] | |
| − | |||
| − | |||
| − | |||
| − | |||
| − | + | [[File:Guardian Axe.gif|link=]] [[Axes|guardian axe]] | |
| − | |||
| − | |||
| − | |||
| − | |||
| − | + | [[File:Deepling Staff.gif|link=]] [[Clubs|deepling staff]]<br>[[File:Deepling Axe.gif|link=]] [[Axes|deepling axe]] | |
| − | |||
| − | |||
| − | |||
| − | |||
| − | < | + | </td> |
| − | <td align=" | + | <td align="left" valign="top"> |
| − | + | <center>'''Other Items'''</center> | |
| − | < | + | [[File:Platinum Coin.gif|link=]]1-35x platinum coin |
| − | |||
| − | + | [[File:Black Pearl.gif|link=]]1-10x black pearl | |
| − | + | </td> | |
| − | |||
| − | |||
</tr> | </tr> | ||
| − | |||
| − | |||
| − | |||
| − | |||
| − | |||
| − | |||
| − | |||
</table> | </table> | ||
== Location == | == Location == | ||
| + | <b><u>Requires level 200</u></b> | ||
| + | |||
1. Take the waypoint to <b><i>[[Waypoint System#Aurora|Aurora - Temple]]</b></i> | 1. Take the waypoint to <b><i>[[Waypoint System#Aurora|Aurora - Temple]]</b></i> | ||
| Line 87: | Line 52: | ||
Pull it to the right. | Pull it to the right. | ||
| − | [[file:deepling bosses map 1.png]] | + | [[file:deepling bosses map 1.png|link=]] |
| − | [[file:deepling bosses lever 1.gif]] | + | [[file:deepling bosses lever 1.gif|link=]] |
3. Follow the maps below to reach the second lever.<br> | 3. Follow the maps below to reach the second lever.<br> | ||
| Line 95: | Line 60: | ||
* If you don't find the ladder on map 2, go back and pull the first lever again. | * If you don't find the ladder on map 2, go back and pull the first lever again. | ||
| − | [[file:deepling bosses map 2.png]] | + | [[file:deepling bosses map 2.png|link=]] |
| − | [[file:deepling bosses lever 2.gif]] | + | [[file:deepling bosses lever 2.gif|link=]] |
4. Follow the maps below to reach the teleporter to the next area. | 4. Follow the maps below to reach the teleporter to the next area. | ||
| − | * On the [[File:Marker (Red).gif]] marker, click the head of the statue to remove the wall and open the passage. | + | * On the [[File:Marker (Red).gif|link=]] marker, click the head of the statue to remove the wall and open the passage. |
| − | [[file:deepling bosses map 3.png]] | + | [[file:deepling bosses map 3.png|link=]] |
| − | [[file:deepling passage 1.gif]] | + | [[file:deepling passage 1.gif|link=]] |
5. Follow the maps below to reach the teleporter to the bosses room. | 5. Follow the maps below to reach the teleporter to the bosses room. | ||
| − | * On the [[File:Marker (Red).gif]] marker, use your pick [[file:Pick.gif]] continuously on the wall to break it and open the passage. | + | * On the [[File:Marker (Red).gif|link=]] marker, use your pick [[file:Pick.gif|link=]] continuously on the wall to break it and open the passage. |
| − | [[file:deepling bosses map 4.png]] | + | [[file:deepling bosses map 4.png|link=]] |
| − | [[file:deepling wall pick.gif]] | + | [[file:deepling wall pick.gif|link=]] |
| − | 6. Click on Trophy of Obujos [[file:Trophy of Obujos.gif]] on the left then on the sealed door on the right. | + | 6. Click on Trophy of Obujos [[file:Trophy of Obujos.gif|link=]] on the left then on the sealed door on the right. |
| − | [[file:Obujos Door.gif]] | + | [[file:Obujos Door.gif|link=]] |
7. The way to Obujos is quite simple. You will find three bifurcations on the way: | 7. The way to Obujos is quite simple. You will find three bifurcations on the way: | ||
| Line 122: | Line 87: | ||
* Third bifurcation: go left | * Third bifurcation: go left | ||
| − | Then enter on the vortex a few steps to the left to fight against the boss. [[file:Vortex Blue.gif]]<br> | + | Then enter on the vortex a few steps to the left to fight against the boss. [[file:Vortex Blue.gif|link=]]<br> |
8. Once the boss dies, enter on the teleport on the center of the room.<br> | 8. Once the boss dies, enter on the teleport on the center of the room.<br> | ||
| − | Follow the maps below to find the reward chest with a chance of giving you an [[Creature Products|Obujos' Shell]] [[File:Obujos' Shell.gif]] | + | Follow the maps below to find the reward chest with a chance of giving you an [[Creature Products|Obujos' Shell]] [[File:Obujos' Shell.gif|link=]] |
| − | [[file:Obujos Chest.png]] | + | [[file:Obujos Chest.png|link=]] |
| − | [[file:Obujos Chest.gif]] | + | [[file:Obujos Chest.gif|link=]] |
== Mechanics == | == Mechanics == | ||
This boss has no special mechanics. | This boss has no special mechanics. | ||
Latest revision as of 22:50, 11 August 2026
Boss
To go back to bosses page, click here

Boss Info
 Classification: Bane
 Location: Aurora Deeplings
 Health: 185k
 Experience: 20k
Bosstiary Progress
 Prowess: 10 kills
 Expertise: 30 kills
 Mastery: 100 kills
Loot Table
 soul of obujos soul of obujos
|
|


 1-35x platinum coin
 1-10x black pearl
Location
Requires level 200
1. Take the waypoint to Aurora - Temple
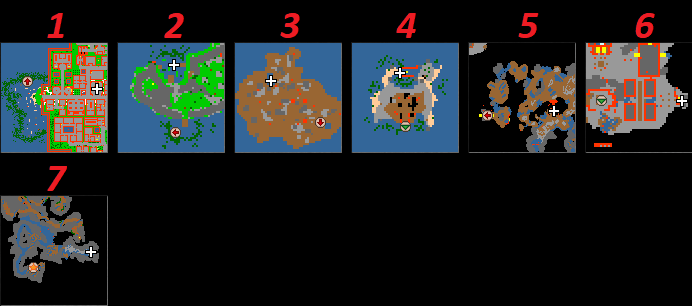
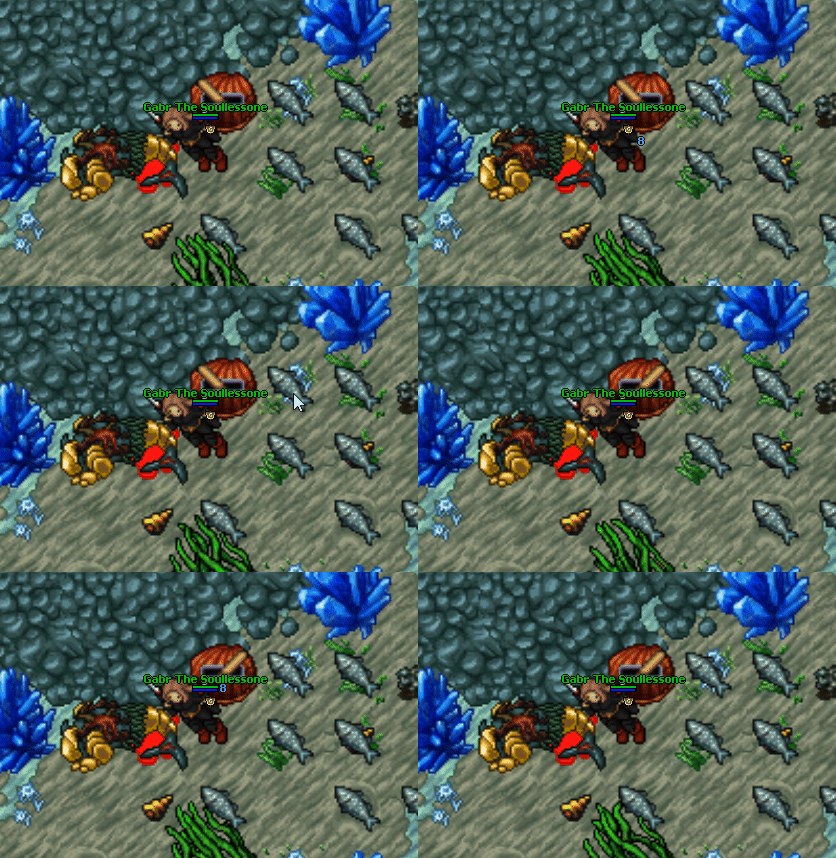
2. Follow the maps below to reach the first lever.
Pull it to the right.
3. Follow the maps below to reach the second lever.
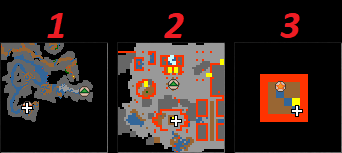
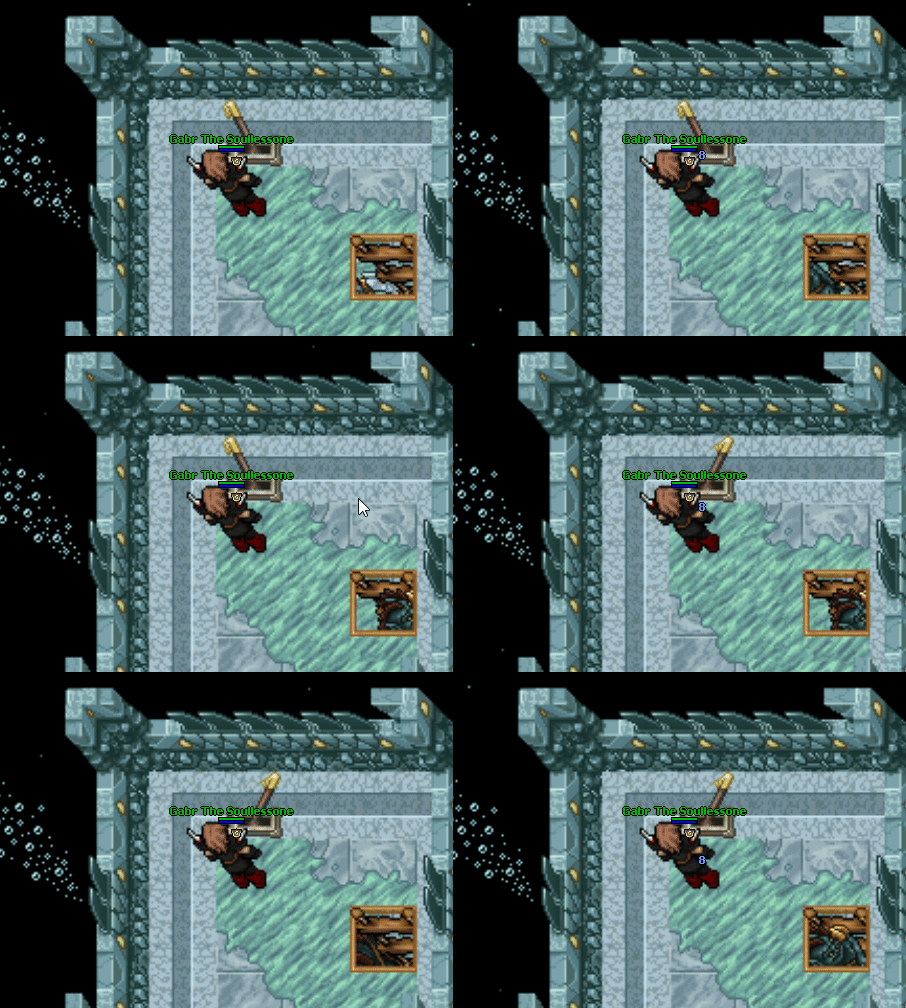
Pull it to the right.
- If you don't find the ladder on map 2, go back and pull the first lever again.
4. Follow the maps below to reach the teleporter to the next area.
- On the
 marker, click the head of the statue to remove the wall and open the passage.
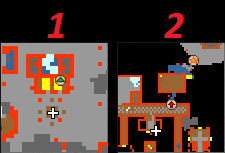
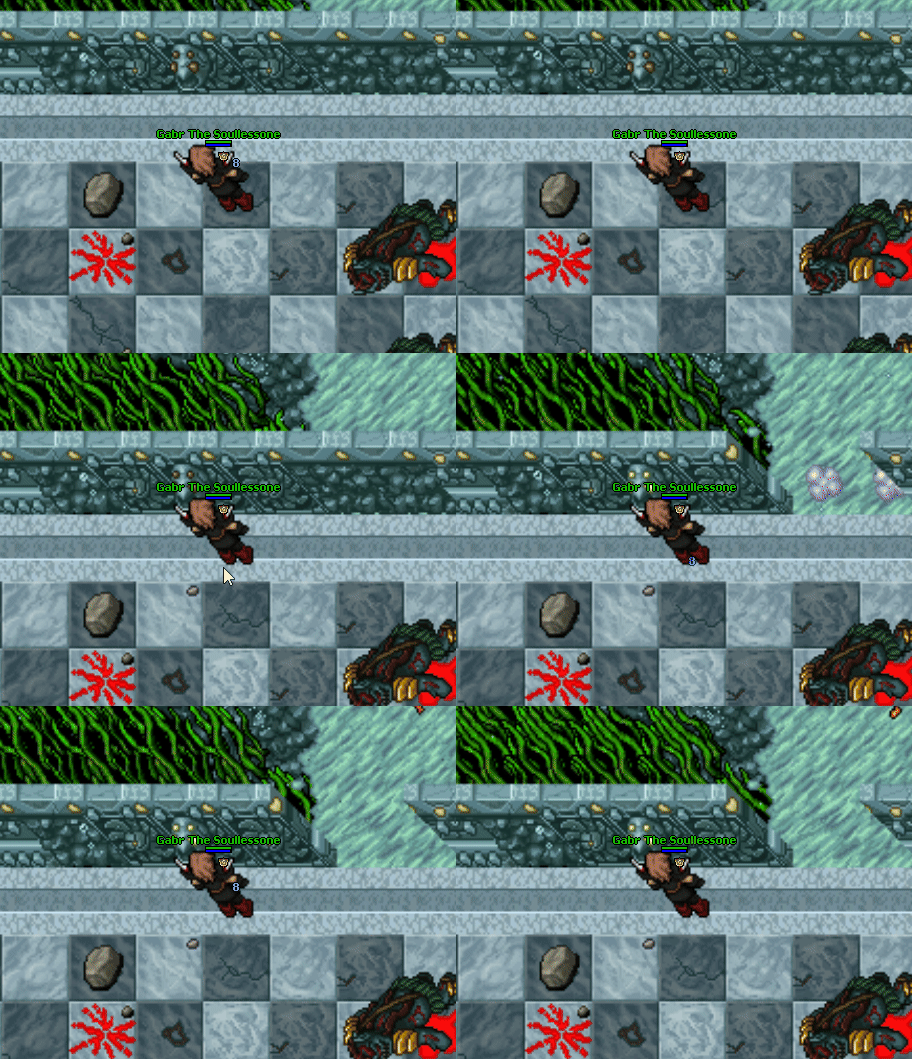
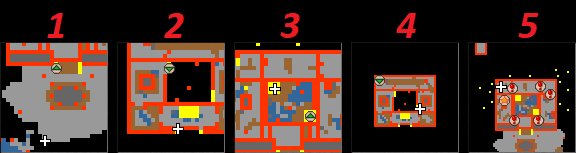
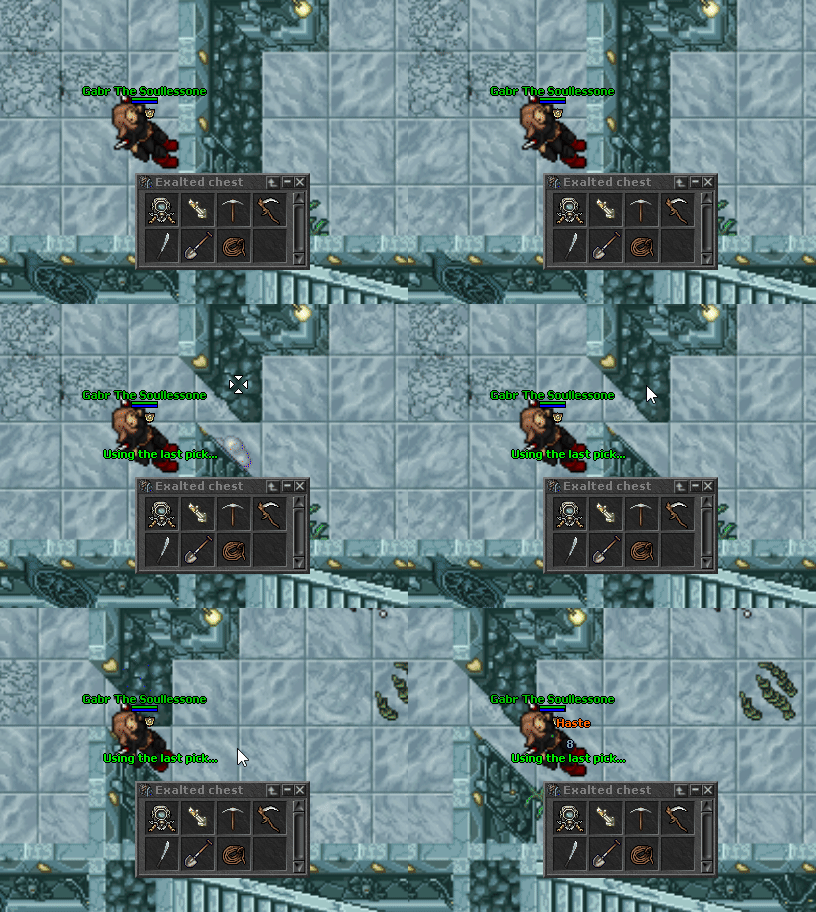
5. Follow the maps below to reach the teleporter to the bosses room.
- On the marker, use your pick
 continuously on the wall to break it and open the passage.
6. Click on Trophy of Obujos  on the left then on the sealed door on the right.
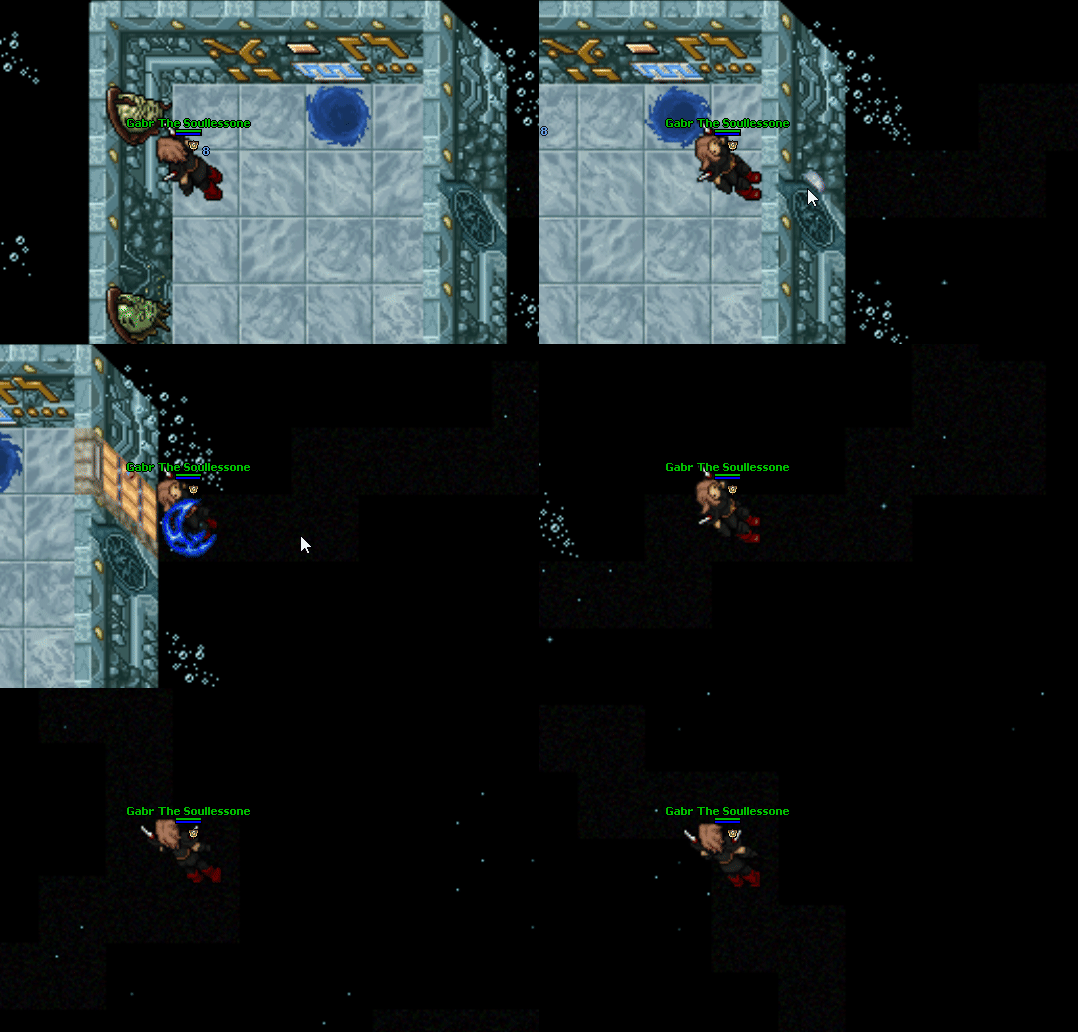
7. The way to Obujos is quite simple. You will find three bifurcations on the way:
- First bifurcation: go left
- Second bifurcation: go down
- Third bifurcation: go left
Then enter on the vortex a few steps to the left to fight against the boss. 
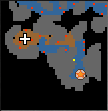
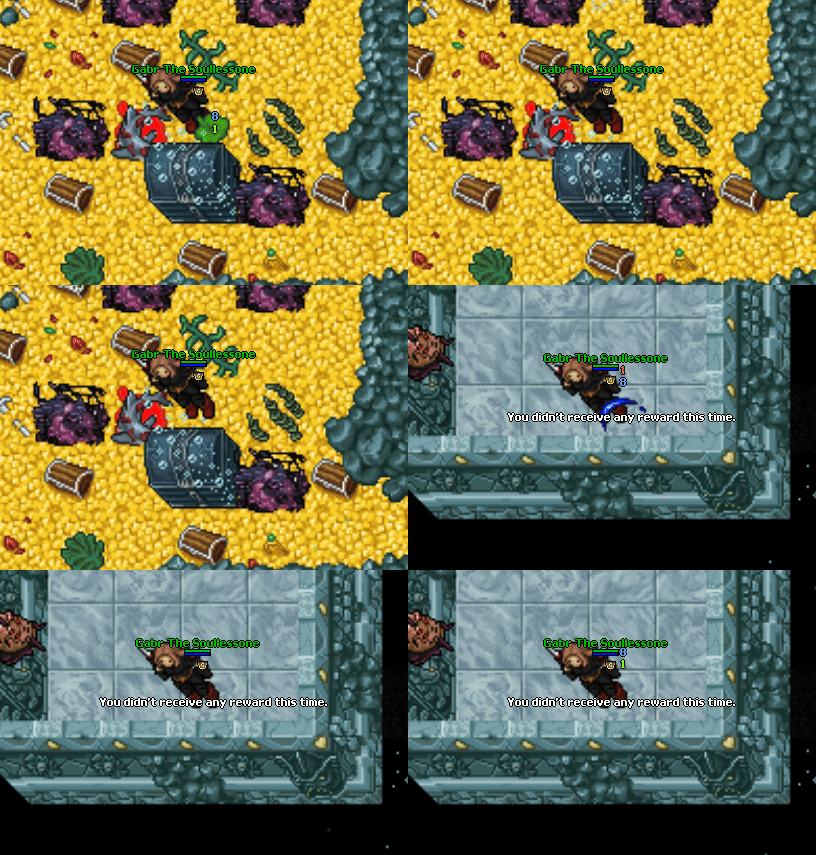
8. Once the boss dies, enter on the teleport on the center of the room.
Follow the maps below to find the reward chest with a chance of giving you an Obujos' Shell 
Mechanics
This boss has no special mechanics.